


How to Choose the Right Ceiling Stud for Your Project?

Choosing the right Ceiling Stud starts with the room above your head, not with a quick glance at a product label. A small bathroom ceiling faces moisture, lighting cutouts, and possible ductwork. A commercial ceiling may carry heavier fixtures, acoustic panels, or service equipment. Each condition changes the specification.

Don Allen, a recognized steel-framing engineer and technical authority, offers a useful principle: “Select the framing member for the load and span, not simply for convenience.” That idea guides this project-focused introduction. It encourages you to check stud depth, thickness, yield strength, spacing, and connection details before installation. A 3 5/8-inch stud may suit a light partition. It may not suit a long ceiling span or a ceiling carrying multiple fixtures. That mistake is easy to make.

This guide explains how to compare Ceiling Stud options with practical judgment. It considers metal gauge, corrosion resistance, deflection control, fastener compatibility, and local building requirements. It also examines how climate, vibration, and access panels affect performance. Measure the span carefully. Inspect the supporting structure. Confirm the expected loads. Then review the manufacturer’s tables and the project engineer’s drawings.

There is no universal “best” stud. That answer sounds convenient, but it is incomplete. A lighter member may reduce cost, yet increase movement or installation difficulty. A thicker member may improve stiffness, but add unnecessary weight. Good selection balances safety, serviceability, budget, and installation reality. When uncertain, pause and verify the design instead of trusting habit.
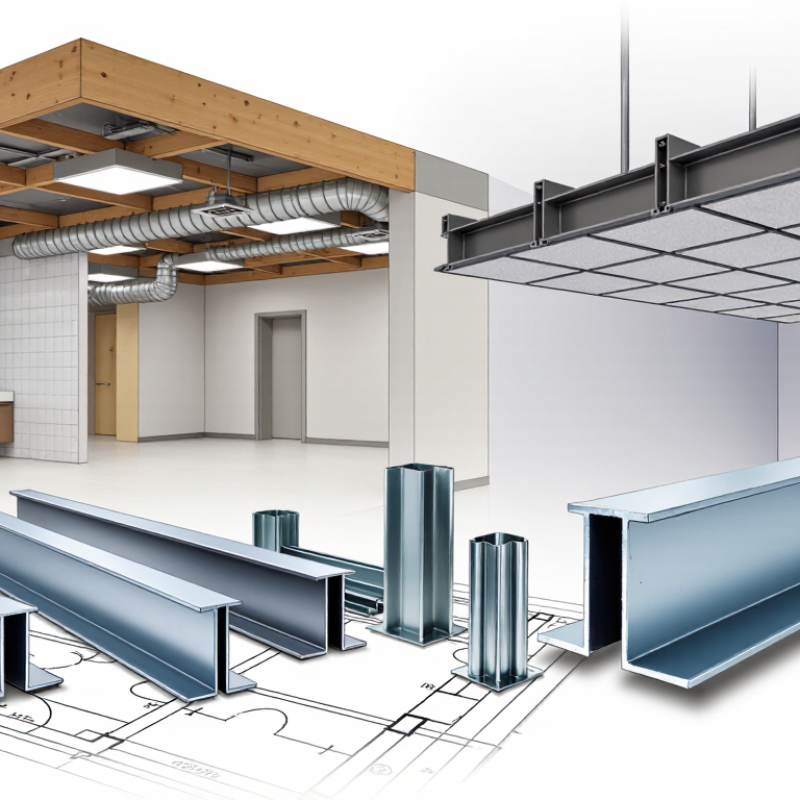
How to Choose the Right Ceiling Stud for Your Project?

Define Ceiling Framing Loads Using IRC R301.5: 10–20 psf Live Load

Choosing the right ceiling stud, often called a ceiling joist, begins with the expected load. IRC R301.5 identifies live-load conditions that commonly range from 10 to 20 pounds per square foot. A ceiling with no intended storage may use the lower value, while limited attic storage may require 20 psf. Confirm the exact classification with your local building department.

Measure the clear span between supports before selecting lumber. Then evaluate spacing, wood species, grade, and joist depth together. A longer span creates more bending, even when the load appears modest. Include gypsum board, insulation, wiring, and other permanent materials as dead load. Do not treat a 10 psf live load as the complete design load.

Small details matter. A ceiling below an attic hatch may receive concentrated loading from a person or stored box. Standard spacing might look adequate, but deflection can still cause visible cracking. I have seen framing pass a quick visual check and later feel springy underfoot. That result deserves reflection, not dismissal. Use approved span tables, keep bearing surfaces level, and avoid cutting or drilling without checking structural limits. For unusual spans, heavy fixtures, or storage beyond the stated category, obtain a design review from a qualified professional. Local amendments may change the practical requirement.

Compare Wood 2×4 Framing with ASTM C645 Steel Stud Profiles

How to Choose the Right Ceiling Stud for Your Project?

When framing a ceiling, wood 2×4 members offer familiar handling and strong screw retention. Their actual size is usually 1.5 by 3.5 inches. I often cut them quickly on site, even when the ceiling is slightly uneven. Wood can also carry designed loads, but moisture may cause swelling, twisting, or shrinkage. That movement can create visible cracks around finished boards.

ASTM C645 steel stud profiles provide a different approach. These members are generally intended for nonstructural interior framing, so the project drawings must confirm their use. Steel stays straight in humid rooms and has consistent dimensions. A track-and-stud system also creates clean, repeatable ceiling lines. However, thin steel needs the correct screws, and careless fastening can strip the flange. Gloves are sensible. The edges can be sharp.

Steel transfers less moisture but can create thermal bridges near exterior ceilings. Insulation placement and thermal detailing therefore deserve careful attention. Wood usually reduces that concern, yet it can add more weight and produce more cutting waste. Steel offcuts are lighter, but they do not always feel easier to install overhead. My first preference is not always correct. I check span, load, humidity, fire requirements, fastener compatibility, and the manufacturer’s design data before selecting a profile. A ceiling that looks simple may still hide demanding structural details.

How to Choose the Right Ceiling Stud for Your Project? - Compare Wood 2×4 Framing with ASTM C645 Steel Stud Profiles

Practical comparison of commonly used ceiling-framing options; verify project requirements, local codes, and manufacturer data before installation.

Comparison Dimension Wood 2×4 Framing ASTM C645 Steel Stud Profile Selection Consideration
Typical finished dimensions Nominal 2×4 lumber has an actual cross-section of approximately 1.5 × 3.5 in. (38 × 89 mm). Common nonstructural ceiling-track and stud systems use profiles such as 3-5/8 in. (92 mm) web depth, with flange and lip dimensions varying by profile. Match the stud depth to the required cavity, insulation thickness, service space, and ceiling assembly details.
Material standard Use structural-grade softwood lumber suitable for framing and compliant with the applicable building code. ASTM C645 covers nonstructural steel framing members, including minimum material and manufacturing requirements for studs and tracks. ASTM C645 members are generally intended for nonload-bearing partitions and ceilings unless a separate engineering design permits otherwise.
Common thickness range Thickness is determined by the lumber size and grade; a nominal 2×4 typically has a 1.5 in. finished thickness. Common light-gauge nonstructural profiles are often specified by mil thickness or gauge, such as approximately 25–30 gauge; actual base-metal thickness must be checked in the product data. Do not select steel by gauge alone. Confirm the actual minimum base-metal thickness, section properties, span tables, and deflection limits.
Typical spacing Common layouts include 16 or 24 in. on center, depending on ceiling finish, load, span, and code requirements. Common layouts also include 16 or 24 in. on center, but spacing depends on profile size, thickness, span, board weight, and deflection criteria. Use the spacing required by the selected ceiling board, framing tables, and project loads rather than choosing spacing by material preference alone.
Strength and stiffness Solid wood provides good fastener-holding capacity and can perform well for small ceiling framing spans when properly graded, supported, and braced. Cold-formed steel strength depends strongly on profile geometry, base-metal thickness, lateral bracing, and connection design. Thin members can be vulnerable to local or lateral buckling. For long spans, heavy finishes, access panels, fixtures, or unusual loads, use a tested system or structural design instead of relying on nominal size.
Weight and handling Individual members are familiar to most installers but can be heavier and less convenient to carry in large quantities. Light-gauge steel members are generally easy to carry and store, although bundled lengths can be awkward and edges may be sharp. Steel can be advantageous where material handling, repetitive layout, or limited site access is important.
Moisture and dimensional stability Wood can absorb moisture and may shrink, swell, warp, or twist if stored or installed before reaching suitable moisture conditions. Galvanized steel does not absorb moisture and does not experience wood-like swelling or shrinkage, but corrosion protection can be damaged by cutting or harsh exposure. Steel is often preferable in moisture-sensitive interiors, provided the environment is compatible with the corrosion-protection system.
Fire performance Wood is combustible. Fire resistance depends on the complete tested ceiling or floor-ceiling assembly, not the stud alone. Steel is noncombustible, but it loses strength and stiffness as temperature rises. Fire resistance still depends on the complete tested assembly. For rated construction, follow the exact tested assembly, including member size, spacing, board layers, fasteners, insulation, and joint treatment.
Fastening and installation Accepts nails and wood screws easily and is simple to cut with conventional saws. Wood blocking can be added wherever fixtures or accessories require support. Typically assembled with self-drilling framing screws, crimping, or approved fastening methods. Cut edges should be handled carefully and penetrations coordinated with the profile. Choose wood when broad fastening flexibility is important; choose steel when a standardized screw-assembled system suits the installation crew and details.
Utilities and penetrations Holes and notches require attention to code limits and should not weaken the framing. Wood is easy to drill but can be damaged by oversized penetrations. Many steel studs include factory-formed service holes, but hole size, location, reinforcement, and cable protection must follow the applicable requirements. Coordinate lighting, ductwork, wiring, and access requirements before closing the ceiling.
Thermal and acoustic behavior Wood has lower thermal conductivity than steel and generally creates less thermal bridging through the framing member. Steel is highly conductive and can create thermal bridges; acoustic performance depends on the complete assembly, including board layers, insulation, resilient channels, and perimeter detailing. For insulated or acoustically sensitive ceilings, evaluate the complete assembly rather than comparing the stud material alone.
Best-fit applications Residential alterations, small framed soffits, areas requiring strong direct fastening, and projects where conventional wood construction is readily available. Interior suspended ceilings, nonload-bearing ceiling framing, commercial fit-outs, and projects emphasizing consistent dimensions and noncombustible framing. Base the decision on span, board weight, fire rating, moisture exposure, acoustic goals, installation method, and local code approval.
Critical verification items Check lumber grade, moisture condition, span, support spacing, bracing, allowable loads, and any notching or drilling limitations. Check ASTM C645 compliance, actual base-metal thickness, web and flange dimensions, section properties, span tables, deflection limits, bracing, and approved connections. If the ceiling carries equipment, partitions, heavy fixtures, or other significant loads, obtain a qualified design or engineering review.

Note: Dimensions, spacing, thickness, allowable spans, and load capacity vary by jurisdiction and framing system. Always use the applicable code and the selected system’s current technical documentation.

Select 16- or 24-Inch On-Center Spacing for Span and Deflection Needs

How to Choose the Right Ceiling Stud for Your Project?

Choosing 16- or 24-inch on-center spacing affects more than material use. It changes how each ceiling member carries weight and resists deflection. With 16-inch spacing, the load is distributed across more members. This arrangement usually creates a stiffer ceiling and better support for drywall, insulation, lighting, and storage access. It also provides more convenient fastening points.

A 24-inch layout can reduce framing time and material costs. However, each member spans farther between supports and carries a larger share of the load. That can increase visible sag, especially with heavier ceiling finishes or long room dimensions. I have seen small spacing changes become noticeable after drywall installation. The surface looked flat at first. Months later, joints exposed minor movement.

Check the required span tables before selecting spacing. Member size, wood grade, moisture, support conditions, and permanent loads all matter. A 16-inch layout is often the safer choice where stiffness matters or the span approaches its limit. A 24-inch layout may work for shorter spans with properly sized members and lighter finishes. Do not assume wider spacing is acceptable because the ceiling feels solid during construction. Temporary confidence can be misleading.

Measure the actual span, not the room’s longest wall. Include fixtures, insulation, and any planned access loads. Local building requirements may also limit spacing or require specific framing dimensions. When the design sits near a table limit, review it with a qualified building professional. A small calculation now can prevent cracked joints and costly ceiling repairs later.

How to Choose the Right Ceiling Stud for Your Project?

Select 16- or 24-inch on-center spacing based on span, load, and deflection requirements.

Across a 12-foot run, 16-inch on-center spacing creates 9 framing spaces and requires 10 framing members, while 24-inch spacing creates 6 spaces and requires 7 members. Wider spacing uses fewer members but can increase deflection risk. Final selection should be verified against the applicable span table, lumber species and grade, member size, loads, and local building code.

Verify Strength Against L/240 Deflection and Applicable Span Tables

How to Choose the Right Ceiling Stud for Your Project?

A ceiling stud must resist both load and visible sag. Check its allowable deflection against L/240 before choosing a size. The “L” means the supported span, measured between bearing points. For a 3,600 mm span, the permitted movement is 15 mm. That limit may seem generous, but even small deflection can crack finishes or create uneven ceiling lines.

Use span tables that match the stud material, grade, spacing, and support conditions. Do not rely on a table for a different load category. Dead load includes framing, boards, insulation, and fixed services. Live load may include maintenance access or suspended equipment. Confirm the table’s assumptions carefully. A member installed on edge behaves differently from one installed flat. Openings for ducts or wiring can also reduce strength.

On site, I measure the actual span rather than trusting an old drawing. I check bearing surfaces, spacing, moisture exposure, and any notches. A visual inspection is not enough. I once underestimated the weight of layered ceiling panels, and the calculated result changed noticeably. That mistake reinforced the value of complete load information. If the span falls outside published tables, or the ceiling carries unusual equipment, obtain a structural review. Small details matter here.

Check ASTM C754 Fastening, Fire Rating, and Corrosion Requirements

How to Choose the Right Ceiling Stud for Your Project?

A ceiling stud must match the assembly, not only the room dimensions. ASTM C754 requires steel framing installation to follow approved fastening methods and project specifications. Check stud thickness, spacing, screw type, and connection points before closing the ceiling. Fasteners should seat firmly without stripping the metal. Small errors matter.

Fire rating belongs to the complete tested assembly. It includes studs, gypsum panels, insulation, joints, penetrations, and supporting construction. NFPA’s Fire Loss in the United States During 2022 reported about 1.5 million fires and 18.1 billion dollars in property damage. That data does not predict one ceiling’s performance, but it shows why untested substitutions are risky. Use the tested assembly’s exact stud size and fastening schedule. A thicker stud is not automatically a better fire solution.

Corrosion requirements deserve equal attention. ASTM C754 and related framing specifications should be reviewed alongside the project’s humidity, ventilation, and exposure conditions. NACE’s IMPACT study estimated global corrosion costs near 2.5 trillion dollars annually, or about 3.4% of global economic output. In practice, select suitable protective coatings and corrosion-resistant fasteners for damp areas. Do not mix metals casually. I have seen otherwise solid ceilings develop staining around poorly chosen screws. The uncomfortable point: field conditions are often less controlled than drawings suggest. Check them again.